
Some of the links in this post are affiliate links. This means that if you click on a link and purchase the item, we may receive an affiliate commission at no additional cost to you. We only recommend products or services that we believe will add value to our readers and are aligned with our values.
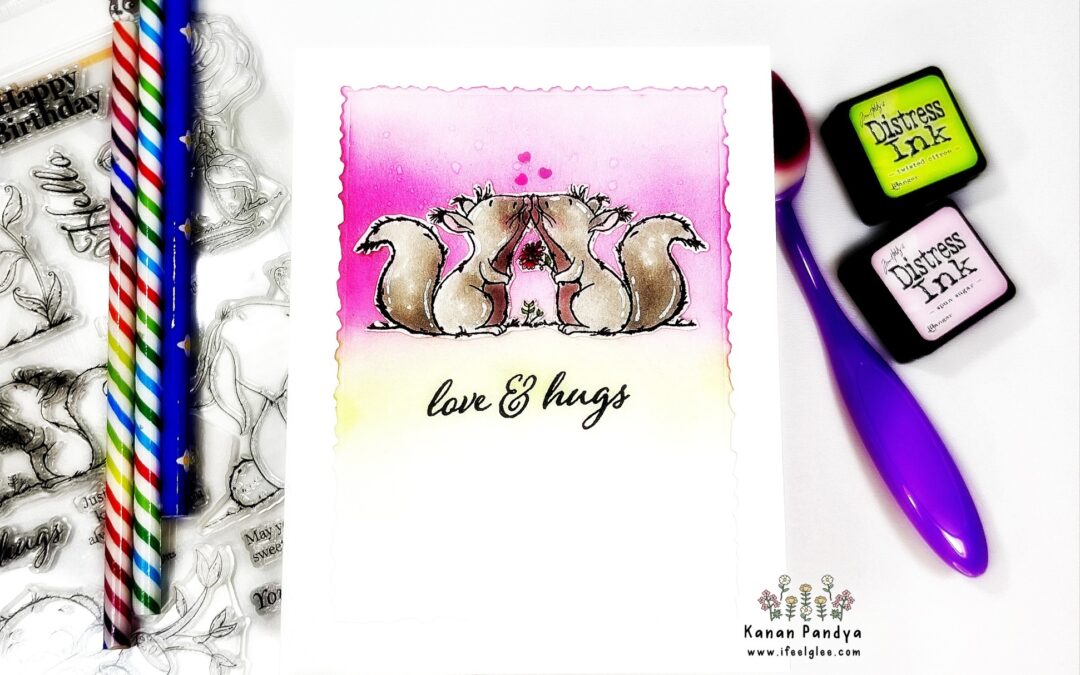
On this gloomy day, let’s brighten things up with some kisses and hugs! In this tutorial, I’ll show you how to create an adorable squirrel-themed card using watercolors and ink blending techniques. Get ready to bring a smile to someone’s face with this heartwarming creation!

Techniques you’ll learn
Stamping, Watercoloring, and Ink Blending
Materials
(If you love the products used in this tutorial, click links to shop now! These are my personal favorites 🙂 Plus, if you purchase the supplies through my affiliate links, you’ll not only support my channel, but you’ll also get everything you need to create your own beautiful handmade cards.)
- Clear Stamps:
- Simon Says Stamp – Caring Thoughts
- Hello Bluebird – Nesting Deckle A2 dies – deckle frame
- Water Markers – Zig Markers
- Glue – Mono Multi Media by American Tombow
- Cardstock – White Smooth
Step-by-step Instructions
Step 1: Stamping the Images Start by stamping the cute squirrel images from the “Caring Thoughts” set by Simon Says Stamp onto Arches watercolor paper. Use a waterproof ink to ensure the lines stay crisp and don’t smudge.
Step 2: Watercoloring the Images Grab your Zig Markers and add beautiful colors to the stamped images. Let your creativity flow as you bring the squirrels to life with vibrant shades. Take your time and enjoy the process of watercoloring.
Step 3: Die Cutting a Panel Using the Nesting Deckle A2 dies by Hello Bluebird, die cut a panel from your favorite cardstock. The deckle frame adds a charming touch to the overall design.
Step 4: Creating an Ink Blended Background Now, let’s create a lovely background for our squirrel friends. Use Distress inks in your preferred colors and blend them onto the die-cut panel. Blend gently, starting with light strokes and gradually building up the color intensity.
Step 5: Adding Water Drops To create a playful effect, add some water drops onto the inked background. Simply sprinkle a few drops of water onto the blended surface and let them interact with the ink. Watch as magic unfolds before your eyes!
Step 6: Adhering the Images Carefully adhere your watercolored squirrel images onto the inked background. Play around with their placement until you achieve a composition that pleases your eye. Use a reliable glue, such as Mono Multi Media, to secure the images in place.
Step 7: Adding the Sentiment To complete the card, add a sentiment from the same stamp set. Choose a heartfelt message that perfectly captures the warmth and love depicted in your squirrel-themed design. Stamp the sentiment onto the card, making sure it harmonizes with the overall aesthetic.
Step 8: Celebrating the Color Combination Take a moment to appreciate the beautiful color combination you’ve created. The chosen colors should complement the cute image and evoke joy. Let the colors speak for themselves and bring life to your card.
Congratulations on crafting a delightful squirrel-themed card using watercolors and ink blending techniques! The adorable image, combined with the carefully chosen colors, will surely bring joy to the lucky recipient. Enjoy the process of spreading love and creativity through handmade cards.
Remember to cherish the smiles you bring to others with your creations. Keep exploring new techniques, experimenting with colors, and enjoying the art of card making. Wishing you endless inspiration and happy crafting!
For more inspiration and crafting ideas, be sure to visit our blog at http://s2w.4e7.mywebsitetransfer.com/craftingarticles/. Happy crafting, my fellow party enthusiasts! 🎉🎂🎈