
Some of the links in this post are affiliate links. This means that if you click on a link and purchase the item, we may receive an affiliate commission at no additional cost to you. We only recommend products or services that we believe will add value to our readers and are aligned with our values.
Techniques you’ll learn
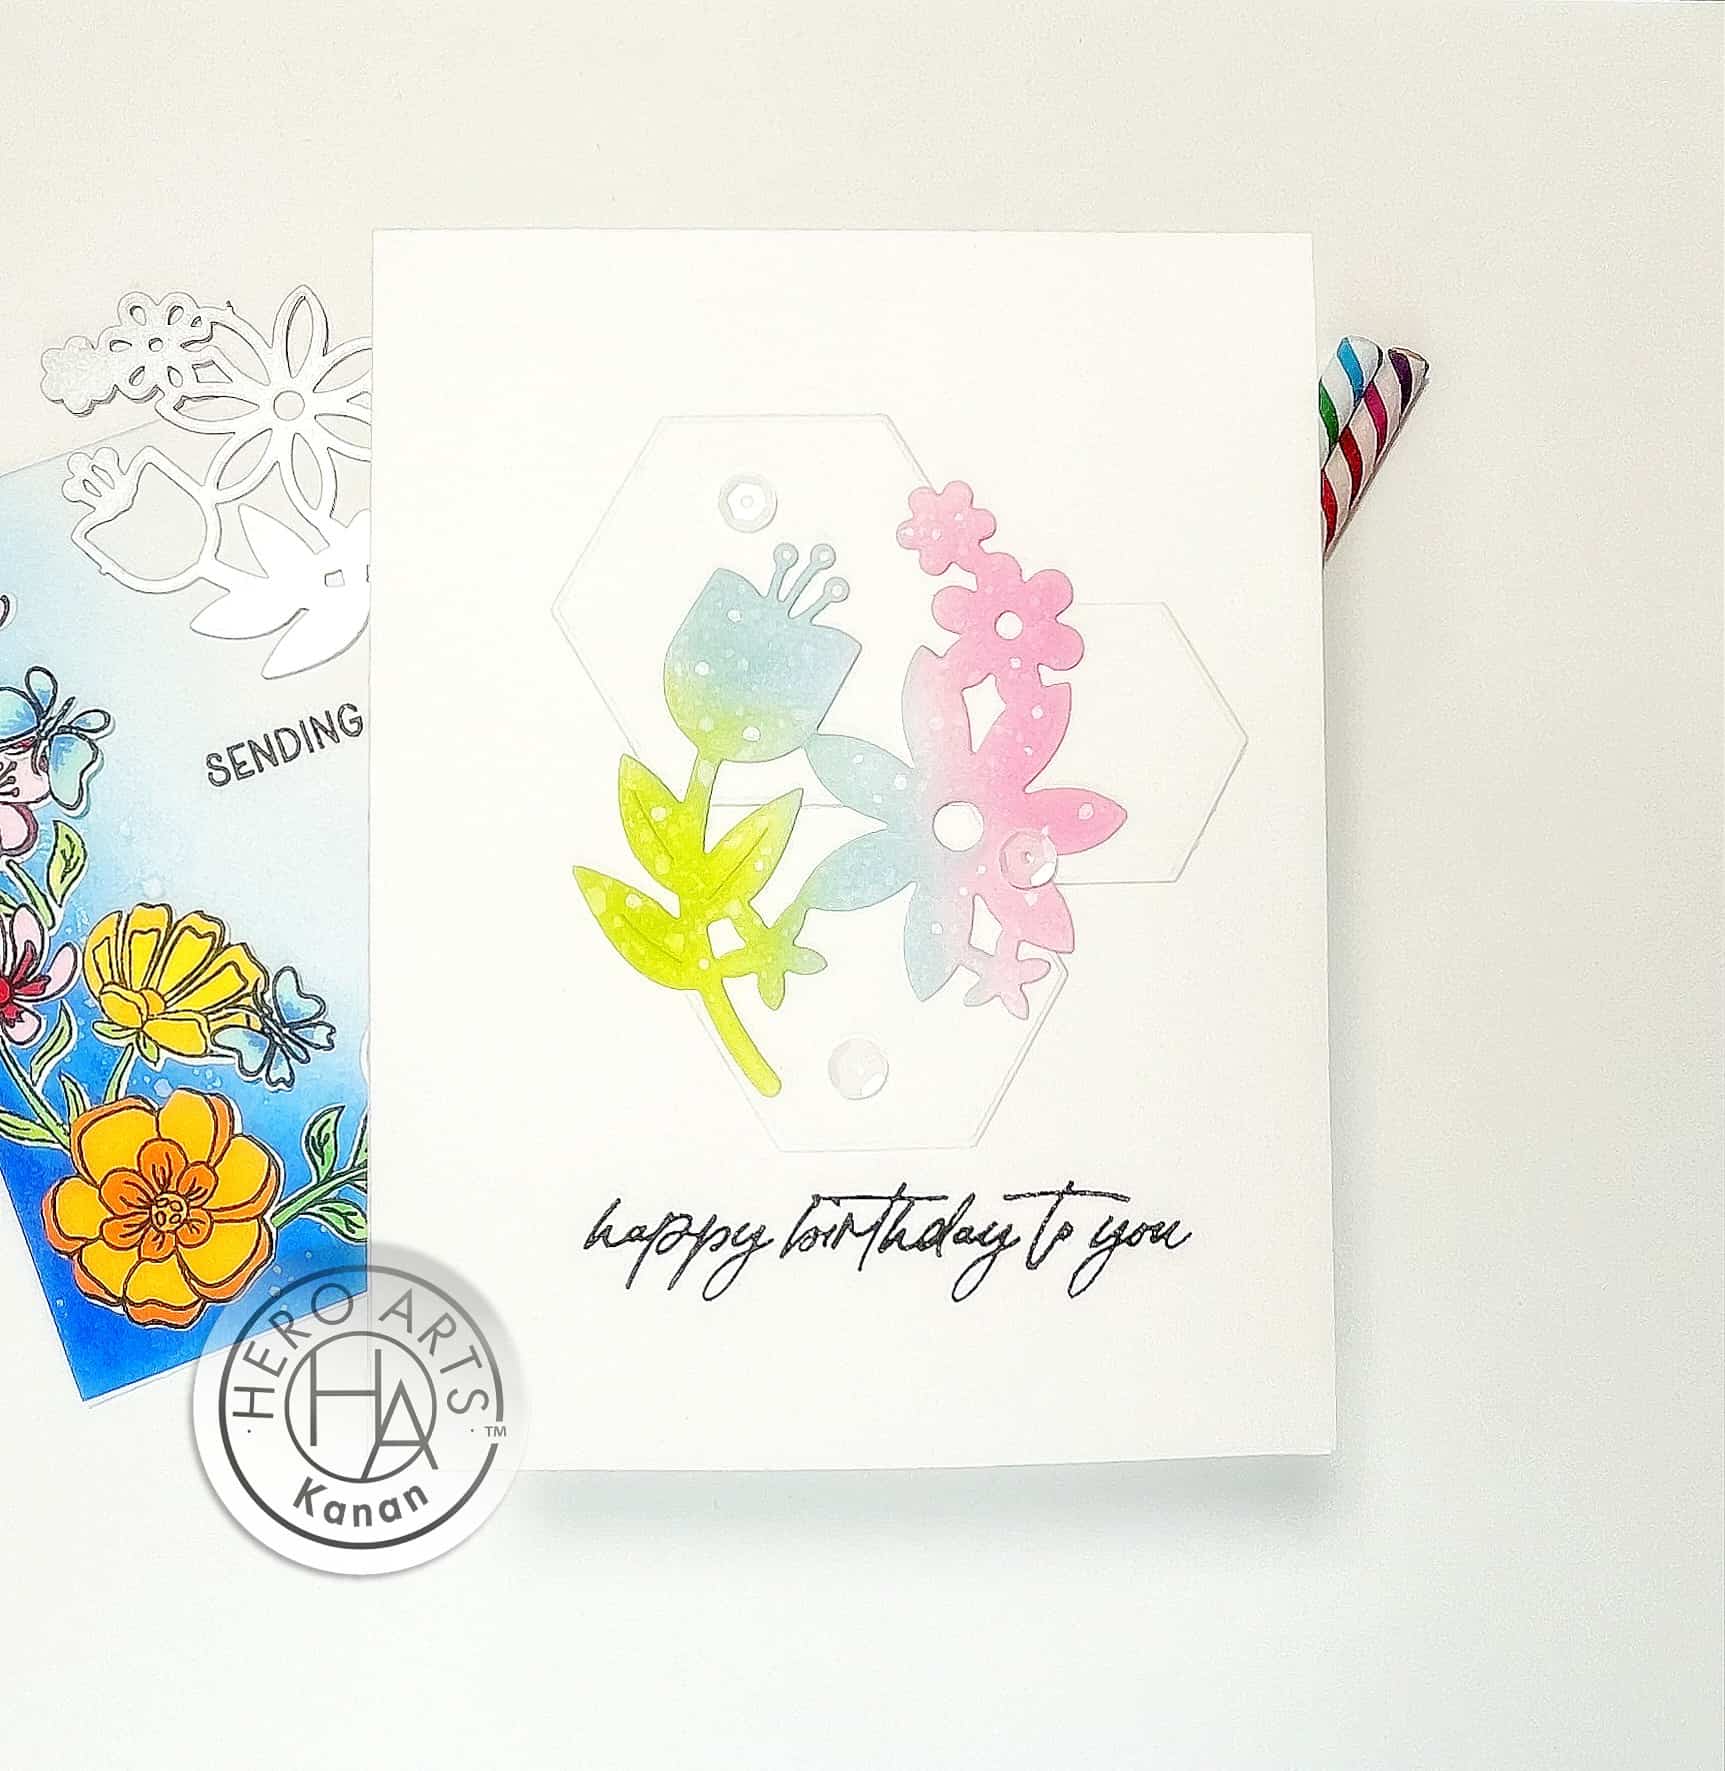
Embossing, Dye cutting, Stamping
Materials
(If you love the products used in this tutorial, click links to shop now! These are my personal favorites 🙂 Plus, if you purchase the supplies through my affiliate links, you’ll not only support my channel, but you’ll also get everything you need to create your own beautiful handmade cards.)
- Secret Garden die by Hero Arts
- Hexagon dies by Hero Arts
- Reactive inks by Hero Arts
- White cardstock
- Wild Columbine Sentiment stamp or die (optional)
- Acrylic block or stamping platform
- Die-cutting machine
- Adhesive
Step-by-step Instructions
- Before die-cutting the Secret Garden die, place it onto the white cardstock and lightly trace around the edges with a pencil. This will help you position the Hexagon dies later on.
- Use a piece of scrap paper to protect your work surface while you ink up the Secret Garden die-cut. This will prevent any excess ink from getting onto your work surface.
- To create a more vibrant and blended look, you can spritz some water onto the inked background using a mister. This will react with the reactive inks and create a fun watercolor effect.
- Once you’ve adhered the Hexagon die-cuts onto the inked background, you can run the whole piece through an embossing folder to add even more texture. Just make sure the Hexagon die-cuts are securely adhered before running it through the embossing folder.
- If you’re using a stamp for your sentiment, make sure to use a stamping platform or acrylic block to ensure even pressure and a clean impression. Test stamp on a scrap piece of paper before stamping onto your cardstock to make sure you’re happy with the placement and impression.
- To add some sparkle and shine, you can use glitter or metallic pens to add highlights to the Hexagon die-cuts or the sentiment. You can also add sequins or gems for some extra bling.
- When you’re finished, don’t forget to sign your card and write a personal message inside for the recipient. This will make the card even more special and thoughtful.

Please follow and like us: