Some of the links in this post are affiliate links. This means that if you click on a link and purchase the item, we may receive an affiliate commission at no additional cost to you. We only recommend products or services that we believe will add value to our readers and are aligned with our values.
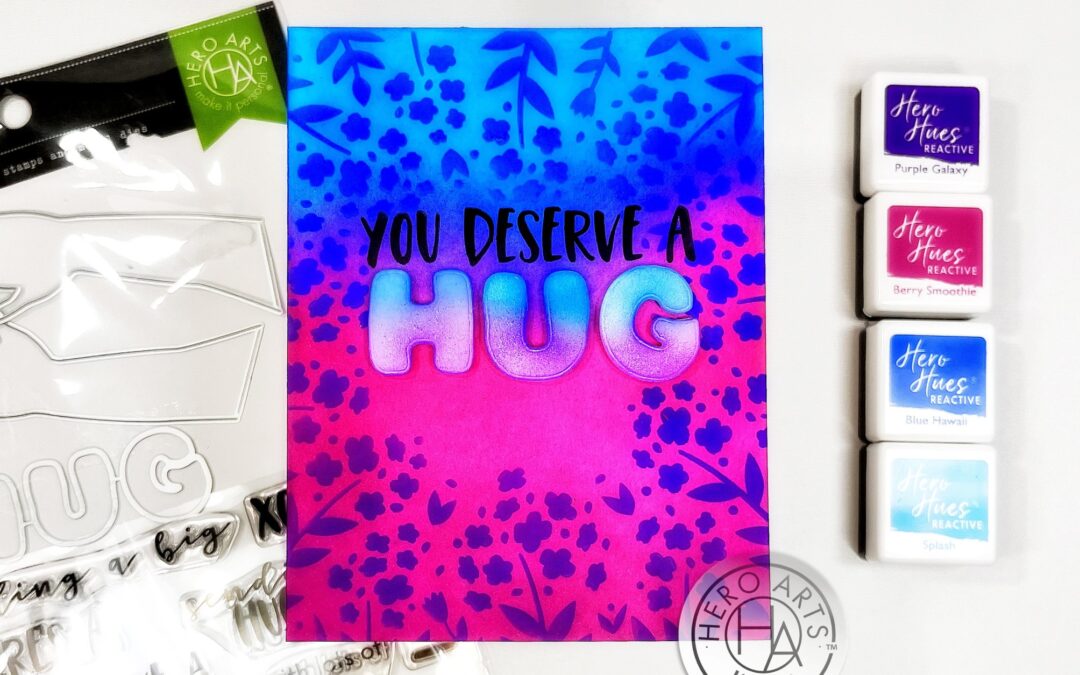
In this tutorial, we’ll dive into a world of inspiration, where ordinary rules no longer apply. Discover unconventional materials, explore innovative techniques, and unleash your creative spirit. Get ready to create extraordinary pieces that reflect your individuality and captivate the world! This has been made for Challenge: Stay Crafty with A Blog Named Hero: June 2023 Challenge – A Sentiment Journey. Please follow the link to participate
https://heroarts.com/blogs/hero-arts-blog/stay-crafty-with-a-blog-named-hero-june-2023-challenge

Techniques you’ll learn
Stamping, Watercoloring, and Ink Blending
Materials
(If you love the products used in this tutorial, click links to shop now! These are my personal favorites 🙂 Plus, if you purchase the supplies through my affiliate links, you’ll not only support my channel, but you’ll also get everything you need to create your own beautiful handmade cards.)
- Clear Stamps:
- Hero Arts – Paper Hug Stamp & Cut XL
- Hero Arts – Flower Circle Stencil
- Inks: Hero Arts Reactive Inks
Step-by-step Instructions
Step 1: Inking the Background Begin by ink blending Hero Arts Reactive inks onto a white card base. Choose colors that evoke warmth and comfort. Blend the inks smoothly to create a soft and soothing background.
Step 2: Stenciling with Flower Circle Stencil Take the Flower Circle Stencil and place it over the inked background. Use the same Hero Arts Reactive inks to gently blend the colors through the stencil, adding a beautiful floral pattern to the card.
Step 3: Die Cutting the “Hug” Word Using the “Paper Hug” Stamp & Cut XL set by Hero Arts, die cut the word “Hug” from cardstock. This bold die-cut sentiment will be the centerpiece of your card.
Step 4: Ink Blending the Die-Cut Word Using the same Hero Arts Reactive inks, carefully blend the chosen colors onto the die-cut word “Hug.” This adds depth and dimension to the sentiment, making it stand out on the card.
Step 5: Stamping the Sentiment Stamp a heartfelt sentiment onto the card using coordinating ink. Choose words that convey the warmth and love you want to share. To add some dimension, consider using foam tape to adhere the sentiment to the card.
Step 6: Admire the Color Combination and Die-Cut Sentiment Take a moment to appreciate the beautiful color combination you’ve created. The blending of warm and comforting hues, along with the bold die-cut sentiment, adds a touch of charm to your card.
Share this card with someone special and let them feel the warmth of your handmade creation.
Remember, it’s the thought and care you put into your cards that make them truly meaningful. Keep exploring new techniques, playing with colors, and spreading love through your creativity. Happy crafting!
For more inspiration and crafting ideas, be sure to visit our blog at http://s2w.4e7.mywebsitetransfer.com/craftingarticles/. Happy crafting, my fellow party enthusiasts! 🎉🎂🎈


